Note the light fixture above the medicine cabinet - the one I don't like (gives off horrible lighting for make-up application) but don't hate enough to change now; it's on my target list for future replacement.
Sunday, February 28, 2010
American Foursquare Remodel 13 - Main Bath Update
I finally got around to taking pictures of the lace curtains and wall decoration in the main bath on the second floor of my American Foursquare circa 1932.
Note the light fixture above the medicine cabinet - the one I don't like (gives off horrible lighting for make-up application) but don't hate enough to change now; it's on my target list for future replacement.
Here is the link for some "before" pictures.
Note the light fixture above the medicine cabinet - the one I don't like (gives off horrible lighting for make-up application) but don't hate enough to change now; it's on my target list for future replacement.
Sunday, February 14, 2010
American Foursquare Remodel 12 - The Den
The Den is done. Well, almost. (Is any home project really ever done?)
Here are some before and after photos of the same basic area of the Den. The wallpapering is all done now, but there is more rearranging and finishing touches to be done in the rest of the room (including re-hanging the double doors).
This sculpture is called "Fanciulla Con Rosa" or "Rose" by Giuseppe Armani.
She's dated 1996 and is signed by the studio master artist. All Armani sculptures bear his signature and studio mark of authenticity imprinted on them, but in some cases, these hand-crafted pieces are also signed by the studio artist. Rose is one such piece. Her decoration matched the room's color scheme, so I put her on display.
I love the movement and celebration of beauty of each of Giuseppe Armani's sculptures. So much so, I collected more than 2 dozen pieces of various sizes on the secondary market (many of the sculptures were already retired and not available in retail stores). One of these days, I'll photograph all of them...
Here are some before and after photos of the same basic area of the Den. The wallpapering is all done now, but there is more rearranging and finishing touches to be done in the rest of the room (including re-hanging the double doors).
Here's the picture rail on duty - as well as a view of the new door casing, and a close-up of the swag border. :)
I have to admit it seems odd that that particular border was matched with that particular paper, but they were!
I bought this area rug from Overstock.com. I was a little hesitant about buying a rug by description only, without actually seeing the quality and - equally as important in this case - the colors. Was I ever delighted with this purchase! It complements the color scheme beautifully and its quality rivals much more expensive rugs. Great deal!
Lady Emily reclining on the chaise. She is such an alpha-female! (A little Aries... need I say more?)
This sculpture is called "Fanciulla Con Rosa" or "Rose" by Giuseppe Armani.
She's dated 1996 and is signed by the studio master artist. All Armani sculptures bear his signature and studio mark of authenticity imprinted on them, but in some cases, these hand-crafted pieces are also signed by the studio artist. Rose is one such piece. Her decoration matched the room's color scheme, so I put her on display.
I love the movement and celebration of beauty of each of Giuseppe Armani's sculptures. So much so, I collected more than 2 dozen pieces of various sizes on the secondary market (many of the sculptures were already retired and not available in retail stores). One of these days, I'll photograph all of them...
American Foursquare Remodel 11 - Main Bath
The main bathroom on the second floor has brownish-tan tile on the lower half and floor, and had pale pink painted wallpaper above. The shower is beautiful, with the surround tiled in matching style, and sliding glass doors (which could use a little rehab). In their later years, my parents put safety handles on two walls of the shower. I think the tub, toilet, and sink were supposed to be beige, but they look pale pink against the tile. The large vanity has a non-descript white laminate top, but two sets of nice deep drawers and a double-door cabinet between. There is also a deep, narrow linen closet in the room. All that adds up to adequate storage.
I don't care for the medicine cabinet and really dislike the light fixture above (it's terrible for applying make-up!), but I don't hate them enough to change them just yet.
At first, I was going to simply repaint the walls - to get rid of the pale pink, and just to get the room moved over to the "Done" list. I matched a dramatic dark brown Sherwin Williams paint to the color in the tile decoration. (Yes, in case you haven't already noticed: for better or worse, the entire house is moving from light colored neutrals to dramatic deep-base hues.) Before painting, I tried to fix the couple of small areas where the painted wallpaper was loose. When I did, I found the paper underneath was not well adhered; it came off the wall in one large sheet. The entire room was stripped in minutes! (Photos were taken on November 11, right after painted wallpaper was removed.)
That left me with a new dilemma. I had already bought the paint, but had not considered wallpaper at this point. However, removing residual paste would be a messy, stinky job of vinegar and hot water. I prefer wallpaper anyway. Plus, I already had the border I intended to apply, purchased 4 years ago to match the entire ensemble I bought at Kohl's when I moved into my Victorian apartment. (Now I'm glad I never got around to applying it to the apartment's bathroom!)
So, the search was on to find wallpaper to match the border as well as the tile...
My first stop was browsing online. Then - because color matching is essential - find someone locally who had the book. Have I mentioned that all my wallpaper choices to date happened to be from books that were discontinued? Yeah, I thought so. Sherwin Williams in Attleboro had the book in the store, but I was warned the patterns could be unavailable when I took the book home...
Of course, I found the perfect match in that book. Not just the main colors, but the background of the wallpaper has that same multi-shade "diffuse clouds" look and color of the tiles. I had to have this paper, and convinced the distributors to sell me what they had.
When I measure for wallpaper, I measure wall height and width, and barely pay attention to doors, windows, and other subtractions. That ensures I always have enough paper - and often a roll left over - even if the pattern has a drop-match (which can wreak havoc on accurate calculations!) Limited stock meant I had to be far more accurate with the measurements - including account for the border - and had to prepare for little if any left-overs. No room for mistakes. I made it by the skin of my pasting brush.
The room still needs window treatments and I have some wall decor, but it's functional... and picture-ready. :)
More pictures are here in an update.
Labels:
American Foursquare,
bathroom,
Four Square,
remodel
American Foursquare Remodel 10 - Kitchen Wallpaper
OK, the kitchen is 99% done... unless I act on my harebrained fantasy of refacing the cabinets. There's just baseboard trim left.
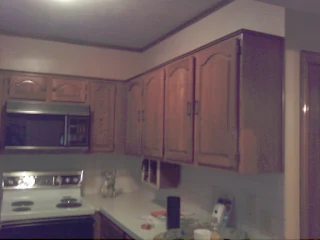
Here is the "before" look - plain off-white walls and some wood trim, natural wood, white counter and backsplash tile. (Again, these "before" pictures were taken with my cell phone camera back in October 2009; pardon the poor resolution.)
Here is my new "Tuscan inspired" wallpaper and area rug. I went with grape clusters. Hope that's not too "Kitchen Kleeshay."
I love the quality of the paper - it was a dream to work with. Of course, the wallpaper book is discontinued and it was tricky to get the paper - juuuuust enough with only scraps left over! In fact, the original order was canceled by one supplier, and I did a little arm-twisting of another distributor to send me what he had and I'd make do with it.
Interestingly, that same scenario played out for the bathroom and den wallpapers, too. But I managed to get the right amounts to do the jobs each time. Whew!
Labels:
American Foursquare,
Four Square,
kitchen,
remodel,
wallpaper
Saturday, February 13, 2010
American Foursquare Remodel 9 - Wood Trim
The window and door casings in the den and living room were changed by my parents circa 1986 when they made some major renovations to their new house. I don't remember the casings before my parents changed them, but my guess is they were not the originals, considering the ugly rustic appearance of the rooms before my parents successfully eradicated the look. Somehow, weathered gray barn board paneling in the den and a huge boulder wall where the fireplace peeked out in the living room didn't strike me as period-sensitive remodeling. I admired my mother for seeing beyond that ugliness to the jewel beneath. But she always did display an aesthetic sense.
That said, they installed economical colonial casing during their remodel. Now during mine, I wanted to reproduce the original wood trim to match the rest of the house.
Wood work and trim create play between shadows and light to silently convey style. The original woodwork in this American Foursquare has its own beauty, character, and balance worth carrying into the rooms where it was missing.
This is the den with the colonial casing. Narrow. Kind of plain.

I also wanted a picture rail installed in as many rooms as I can afford. I can hardly believe it's so hard to find - it's such a great idea! Decorating or re-arranging height and location of mirrors, pictures, and other wall decor is a matter of moving the little "S" clips instead of marring the walls with unsightly holes.
Here are samples of the picture rail installation. In the den, I wanted it close to the ceiling because of the wallpaper border I chose.
Here is a link to the room after wallpaper and painting was finished.
In the parlor, it's installed under the existing (and re-painted) lincrusta* frieze.
Shopping sources:
JT's Lumber for the picture rail and Azek trim
Builders Surplus for the select fir boards
Home Depot for the select fir boards
Lincrusta and Anaglypta Paintable Wall Covering
Another beautiful Lincrusta site
That said, they installed economical colonial casing during their remodel. Now during mine, I wanted to reproduce the original wood trim to match the rest of the house.
Wood work and trim create play between shadows and light to silently convey style. The original woodwork in this American Foursquare has its own beauty, character, and balance worth carrying into the rooms where it was missing.
This is the den with the colonial casing. Narrow. Kind of plain.
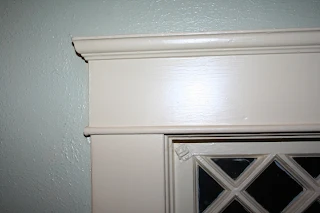
This is the original window casing and trim (from the hallway) and baseboard (from the dining room):

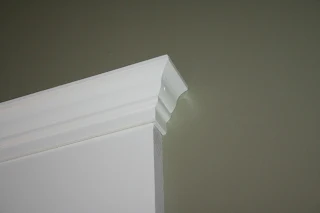
And here is the brand new wood trim in the parlor window and den baseboard. Alan did a superb job.
It was a major pain to find the solid crown cap for the windows and doors, as well as the base cap. I finally chose an Azek crown trim that was closer than any real wood trim I saw. Custom milling was out of the question because the amount I needed didn't make it financially worth it for carpenters to create the tool. Even this cap crown had to be trimmed to better imitate the original, though. Again, Alan did a superb job with measuring and installing.
The base cap isn't an exact match either, but the new profile compliments the old.
I also wanted a picture rail installed in as many rooms as I can afford. I can hardly believe it's so hard to find - it's such a great idea! Decorating or re-arranging height and location of mirrors, pictures, and other wall decor is a matter of moving the little "S" clips instead of marring the walls with unsightly holes.
Here are samples of the picture rail installation. In the den, I wanted it close to the ceiling because of the wallpaper border I chose.
Here is a link to the room after wallpaper and painting was finished.
In the parlor, it's installed under the existing (and re-painted) lincrusta* frieze.
*Lincrusta ("Lin" for linum or flax, where linseed oil comes from, and "crusta" or relief) is a heavily embossed linoleum wall covering made from totally natural materials - linseed oil and wood. Very durable, washable, and paintable, it is practical as well as decorative - it also hides wall imperfections. Launched in 1877, it gave the Victorians an affordable alternative to plaster ornamentation. source: lincrusta.com
Lighting is an amazing thing. The flat paint of the ceiling and frieze lincrusta, and satin finish of the picture rail are really the same color, and in person, it's obvious. Any variations in these images are caused by the camera angle and ambient light.
Shopping sources:
JT's Lumber for the picture rail and Azek trim
Builders Surplus for the select fir boards
Home Depot for the select fir boards
Lincrusta and Anaglypta Paintable Wall Covering
Another beautiful Lincrusta site
Subscribe to:
Comments (Atom)


